
Introduction
If you’re a local business owner, having an online presence is essential, and one of the most effective ways to do this is by creating a Google My Business (GMB) account. Google My Business is a free tool that helps your business appear on Google Maps and in local search results. It provides key information such as your business location, hours, contact information, and customer reviews. Setting up a Google My Business account ensures that local customers can easily find your business online, and optimizing it correctly can help you rank higher in local searches.
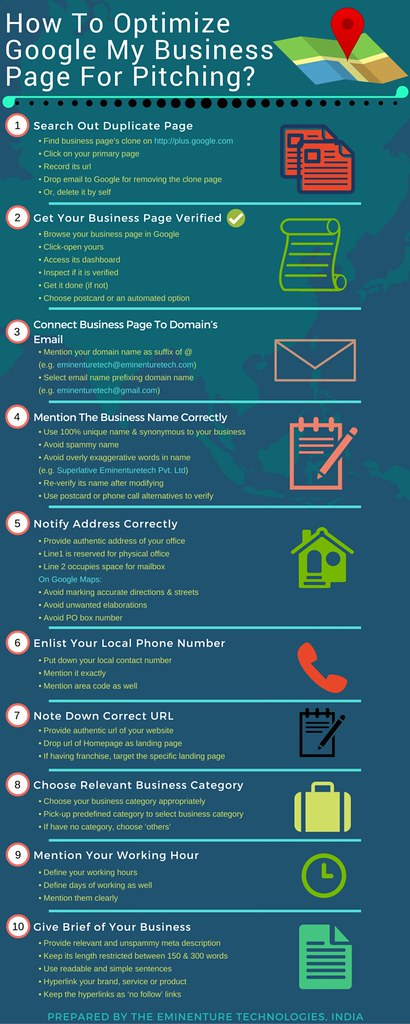
In this guide, we’ll take you through the simple steps of how to set up a Google My Business account and share tips for optimizing it to increase visibility and attract more customers.
Step 1: Create a Google Account
Before knowing How to Set Up a Google My Business Account you , you need a Google account. If you already have one, you can use that; if not, you’ll need to create one.
Key Steps:
- Go to Google.
- Fill in your personal details like name, email, and password.
- Confirm your information and finish setting up your Google account.
This Google account will be used to manage your business profile and access other Google tools like Gmail, Google Analytics and Google Ads.
Step 2: Go to Google My Business
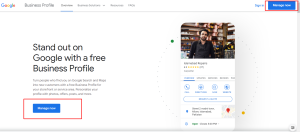
Once your Google account is ready, visit the Google My Business website and click on the “Manage Now” button. This will take you to the setup page where you can start creating your business profile.
Step 3: Enter Your Business Name
In the first field, enter the name of your business exactly as you want it to appear on Google. Ensure the name is spelled correctly and is consistent with how you represent your business on other online platforms and social media.

Tip: If your business name includes keywords relevant to your industry or location, it may help with local search rankings. However, avoid stuffing unnecessary keywords, as Google may penalize your listing.
Step 4: Choose a Business Category
Next, you’ll be asked to choose the category that best describes your business. This is important because it helps Google determine when to show your business in relevant searches.
Key Steps:
- Type in a category that fits your business. Google will suggest options as you type.
- Choose the category that most closely aligns with your services.
You can add additional categories later, but the primary category should be the one that best represents what your business does.
Step 5: Add Your Business Location
If your business has a physical storefront or office that customers can visit, you should enter your business address. This will allow your business to appear on Google Maps and local search results. If you don’t have a physical location but still offer services in a specific area, you can specify your service areas instead.
Key Steps for Adding a Location:
- Select “Yes” when asked if you have a physical location.
- Enter the complete address, including city, state, and postal code.
- Drag the map pin to ensure the location is correct.
For service-area businesses, you can select the “No” option and add the regions or cities you serve.
Step 6: Enter Your Contact Information
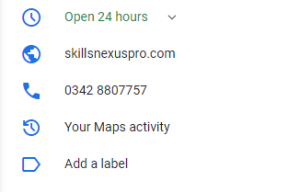
Providing accurate contact information is crucial for customers to reach you. In this step, you’ll be asked to enter your phone number and website URL. This will allow customers to call your business directly from Google or visit your website for more information.
Key Tips:
- Use a business phone number that is regularly monitored.
- Ensure your website URL is active and leads to a professional-looking site with relevant information.
Step 7: Verify Your Business
Once you’ve entered all the necessary information, you’ll need to verify your business. Verification helps Google ensure that the business is legitimate and that you are authorized to manage the listing. Most businesses can verify via postcard, which Google will send to your business address with a unique verification code.
Key Steps:
- Select the verification method (usually postcard by mail).
- Wait for the postcard to arrive, which can take up to 5 days.
- Enter the verification code on your Google My Business account.
Once your business is verified, your listing will go live, and you can begin managing it.
Step 8: Optimize Your Google My Business Profile
After learning, How to Set Up a Google My Business Account, the next step is optimization. A well-optimized profile will help your business rank higher in local search results and attract more customers. Here’s how you can optimize your profile:
Add Business Hours:
Make sure to list your accurate business hours. You can also update these hours during holidays or special events, so customers always know when you’re open.
Write a Compelling Business Description:
The business description is where you can tell potential customers what your business is about. Include key information such as what services you offer, what sets your business apart, and why customers should choose you.
Tips for a Great Description:
- Use relevant keywords naturally (like “how to set up a Google My Business account” if that’s your business).
- Keep it clear and concise.
- Highlight any special services or unique selling points.
Upload Photos:
Visual content is crucial in attracting potential customers. Upload high-quality photos of your storefront, office, team, and products or services. This helps build trust with customers and gives them a better sense of what your business is like.
Encourage Customer Reviews:
Learning how to set up a Google My Business account Customer Reviews are important.
Positive reviews are one of the best ways to improve your local ranking and attract new customers. Ask satisfied clients to leave a review on your Google My Business listing. Always respond to reviews, whether they’re positive or negative, to show that you value customer feedback.

Step 9: Use Google Posts
Google My Business allows you to create posts that appear in your business listing. You can use these posts to promote events, special offers, new products, or important updates. Posts are a great way to engage with potential customers and keep your listing fresh and active.
How to Create a Google Post:
- Log in to your Google My Business account.
- Click on the “Posts” tab in the menu.
- Create a post with an image, description, and a call-to-action.
- Publish the post to your profile.
These posts can be updated frequently to keep your audience engaged.
Step 10: Monitor and Update Your Listing
Once your Google My Business account is up and running, it’s essential to regularly monitor your listing. Keep your information up to date, respond to customer reviews, and continue optimizing your profile for better local search performance.
Key Steps:
- Log in to your Google My Business dashboard at least once a week.
- Check for any updates or new reviews.
- Adjust your business hours or other details as needed.
- Track your profile’s performance using Google My Business insights, which show how many people viewed your listing and where they came from.
By following these steps you will learn how to set up a Google My Business account.
Conclusion
Setting up a Google My Business account is one of the most effective ways to get your business noticed in local searches. By following these steps on how to set up a Google My Business account, you can create a strong online presence that helps customers find and trust your business. From creating your profile to optimizing it with photos, reviews, and posts, Google My Business is an invaluable tool for any local business aiming to grow its customer base and enhance its online visibility.